
SvelteKit is a frontend framework that enables you to build Svelte applications with modern techniques, such as Server-Side Rendering, automatic code splitting, and advanced routing.
You can deploy your SvelteKit projects to Vercel with zero configuration, enabling you to use Preview Deployments, Web Analytics, Vercel functions, and more.
Get started with SvelteKit on Vercel
To get started with SvelteKit on Vercel:
- If you already have a project with SvelteKit, install Vercel CLI and run the vercel command from your project's root directory
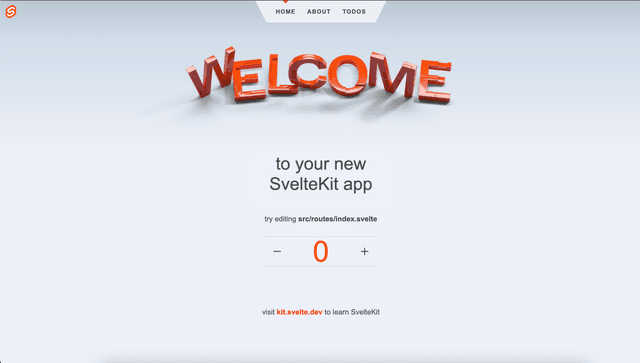
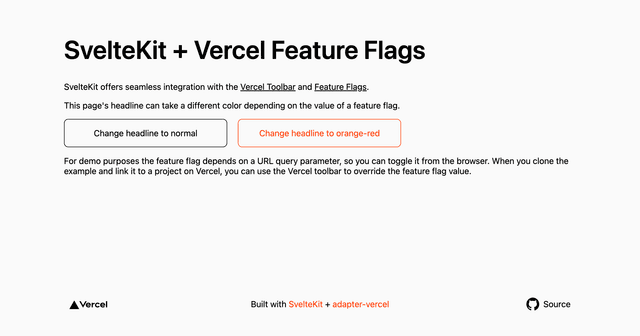
- Clone one of our SvelteKit example repos to your favorite git provider and deploy it on Vercel with the button below:


" A trusted partner for growth.
Professional, efficient, and always ahead of the curve. "
" Outstanding service and results!
They exceeded our expectations in every project. "

User-Friendly Interface
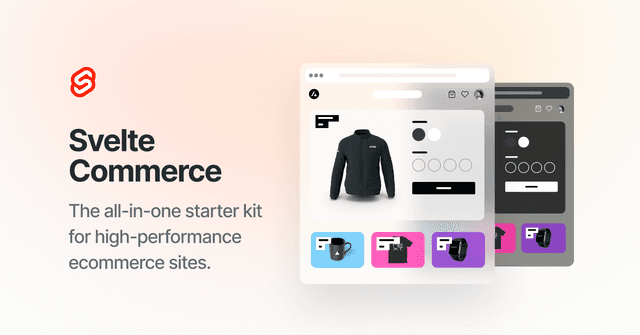
An all-in-one starter kit for high-performance e-commerce sites built with SvelteKit.
Vercel deployments can integrate with your git providerto generate preview URLsfor each pull request you make to your SvelteKit project.
Use Vercel features with Svelte
When you create a new SvelteKit project with npm create svelte@latest, it installs adapter-auto by default. This adapter detects that you're deploying on Vercel and installs the @sveltejs/adapter-vercel plugin for you at build time.
We recommend installing the @sveltejs/adapter-vercel package yourself. Doing so will ensure version stability, slightly speed up your CI process, and allows you to configure default deployment options for all routes in your project.
The following instructions will guide you through adding the Vercel adapter to your SvelteKit project.
-
Install SvelteKit's Vercel adapter pluginYou can add
the Vercel adapter to your SvelteKit project by running the following command:
pnpm
yarn
npm
bun

 pnpm i @sveltejs/adapter-vercel
 -
Add the Vercel adapter to your Svelte configAdd the Vercel adapter to your
svelte.config.js file,
which should be at the root of your project directory.
In your svelte.config.js file, import adapter from @sveltejs/adapter-vercel, and add your preferred options. The following example shows the default configuration, which uses the Node.js runtime (which run on Vercel functions). TypeScript for your SvelteKit config
file.
TypeScript for your SvelteKit config
file.
import adapter from'@sveltejs/adapter-vercel';
exportdefault {
kit: {adapter:adapter(),
}, }; Learn more about configuring your Vercel deployment in our configuration section below.
Configure your SvelteKit deployment
You can configure how your SvelteKit project gets deployed to Vercel at the project-level and at the route-level.
Changes to the config object you define in svelte.config.js will affect the default settings for routes across your whole project. To override this, you can export a config object in any route file.
The following is an example of a svelte.config.js file that will deploy using server-side rendering in Vercel's Node.js serverless runtime:
adapter:adapter({
kit: {
constconfig= {
import adapter from'@sveltejs/adapter-vercel';
/** @type{import('@sveltejs/kit').Config} */
},
};
}),
exportdefault config;
runtime:'nodejs20.x',
Although this Website may be linked to other websites, we are not, directly or indirectly, implying any approval.

runtime:'edge',
import { PageServerLoad } from'./$types';
exportconstconfig= {
TypeScript

You can also configure how individual routes deploy by exporting a config object. The following is an example of a route that will deploy on Vercel's Edge runtime:
};
};
// Load function code here
exportconstload= ({ cookies }):PageServerLoad => {
Learn about all the config options available in the SvelteKit docs. You can also see the type definitions for config object properties in the SvelteKit source code.
SvelteKit's docs have a comprehensive list of all config options available to you. This section will cover a select few options which may be easier to use with more context.
By default, your SvelteKit routes get bundled into one Function when you deploy your project to Vercel. This configuration typically reduces how often your users encounter cold starts.
In most cases, there is no need to modify this option.
Setting split: true in your Svelte config will cause your SvelteKit project's routes to get split into separate Vercel Functions.
Splitting your Functions is not typically better than bundling them. You may want to consider setting split: true if you're experiencing either of the following issues:
- You have exceeded the Function size limit for the runtime you're using. Batching too many routes into a single Function could cause you to exceed Function size limits for your Vercel account. See our Function size limits to learn more.
- Your app is experiencing abnormally long cold start times. Batching Vercel functions into one Function will reduce how often users experience cold starts. It can also increase the latency they experience when a cold start is required, since larger functions tend to require more resources. This can result in slower responses to user requests that occur after your Function spins down.
Choosing a region allows you to reduce latency for requests to functions. If you choose a Function region geographically near dependencies, or nearest to your visitor, you can reduce your Functions' latency.
By default, your Vercel Functions will be deployed in Washington, D.C., USA, or iad1. Adding a region ID to the regions array will deploy your Vercel functions there. See our Vercel Function regions docs to learn how to override this settings.
Streaming
Vercel supports streaming API responses over time with SvelteKit, allowing you to render parts of the UI early, then render the rest as data becomes available. Doing so lets users interact with your app before the full page loads, improving their perception of your app's speed. Here's how it works:
- SvelteKit enables you to use a +page.server.ts file to fetch data on the server, which you can access from a +page.svelte file located in the same folder
- You fetch data in a
load function defined in
+page.server.ts. This function returns an object
- Top-level properties that return a promise will resolve before the page renders
- Nested properties that return a promise will stream
The following example demonstrates a load function that will stream its response to the client. To simulate delayed data returned from a promise, it uses a sleep method.
}
exportfunctionload(event):PageServerLoad
returnnewPromise((fulfill) => {
event.request.headers.get('x-vercel-ip-city') ??'unknown',
setTimeout(() => {
});
// a delayed API response.
);
}, ms);
// Get some location data about the visitor
fulfill(value);
},
TypeScript
constcity=decodeURIComponent(
locationData: {
topLevelExample:sleep({ data:"This won't be streamed" },2000)
return {
};
}
// Stream the location data to the client
You could then display this data by creating the following +page.svelte file in the same directory:
{/await}
{:then details}
City is {details.city}

Hello!
TypeScript
export let data: PageData;
And IP is: {details.ip}
{#awaitdata.locationData.details}
streaming delayed data from the server...
To summarize, Streaming with SvelteKit on Vercel:
- Enables you to stream UI elements as data loads
- Supports streaming through Vercel Functions
- Improves perceived speed of your app
Learn more about Streaming on Vercel.
Server-Side Rendering
Server-Side Rendering (SSR) allows you to render pages dynamically on the server. This is useful for pages where the rendered data needs to be unique on every request. For example, verifying authentication or checking the geolocation of an incoming request.
Vercel offers SSR that scales down resource consumption when traffic is low, and scales up with traffic surges. This protects your site from accruing costs during periods of no traffic or losing business during high-traffic periods.
SvelteKit projects are server-side rendered by default. You can configure individual routes to prerender with the prerender page option, or use the same option in your app's root +layout.js or +layout.server.js file to make all your routes prerendered by default.
While server-side rendered SvelteKit apps do support middleware, SvelteKit does not support URL rewrites from middleware.
See the SvelteKit docs on prerendering to learn more.
To summarize, SSR with SvelteKit on Vercel:
- Scales to zero when not in use
- Scales automatically with traffic increases
- Has zero-configuration support for Cache-Control headers, including stale-while-revalidate
Environment variables
Vercel provides a set of System Environment Variables that our platform automatically populates. For example, the VERCEL_GIT_PROVIDER variable exposes the Git provider that triggered your project's deployment on Vercel.
These environment variables will be available to your project automatically, and you can enable or disable them in your project settings on Vercel. See our Environment Variables docs to learn how.
Use Vercel environment variables with SvelteKit
SvelteKit allows you to import environment variables, but separates them into different modules based on whether they're dynamic or static, and whether they're private or public. For example, the '$env/static/private' module exposes environment variables that don't change, and that you should not share publicly.
System Environment Variables are private and you should never expose them to the frontend client. This means you can only import them from '$env/static/private' or '$env/dynamic/private'.
The example below exposes VERCEL_COMMIT_REF, a variable that exposes the name of the branch associated with your project's deployment, to a load function for a Svelte layout:
typeDeploymentInfo= {
deploymentGitBranch:string;
import { VERCEL_COMMIT_REF } from'$env/static/private';
TypeScript
exportfunctionload():LayoutServerLoad
};
};
return {
deploymentGitBranch:'Test',
import { LayoutServerLoad } from'./types';
}
You could reference that variable in a corresponding layout as shown below:
This staging environment was deployed from {data.deploymentGitBranch}.
To summarize, the benefits of using Environment Variables with SvelteKit on Vercel include:
- Access to vercel deployment information, dynamically or statically, with our preconfigured System Environment Variables
- Access to automatically-configured environment variables provided by integrations for your preferred services
- Searching and filtering environment variables by name and environment in Vercel's dashboard
Incremental Static Regeneration (ISR)
Incremental Static Regeneration allows you to create or update content without redeploying your site. When you deploy a route with ISR, Vercel caches the page to serve it to visitors statically, and rebuilds it on a time interval of your choice. ISR has three main benefits for developers: better performance, improved security, and faster build times.
See our ISR docs to learn more.
To deploy a SvelteKit route with ISR:
- Export a config object with an isr property. Its value will be the number of seconds to wait before revalidating
- To enable on-demand revalidation, add the bypassToken property to the config object. Its value gets checked when GET or HEAD requests get sent to the route. If the request has a x-prerender-revalidate header with the same value as bypassToken, the cache will be revalidated immediately
The following example demonstrates a SvelteKit route that Vercel will deploy with ISR, revalidating the page every 60 seconds, with on-demand revalidation enabled:
exportconstconfig= {
isr: {
expiration:60,
TypeScript
bypassToken:'REPLACE_ME_WITH_SECRET_VALUE',
};
To summarize, the benefits of using ISR with SvelteKit on Vercel include:
Learn more about ISR with SvelteKit.
- Better performance with our global CDN
- Zero-downtime rollouts to previously statically generated pages
- Framework-aware infrastructure enables global content updates in 300ms
- Generated pages are both cached and persisted to durable storage
Skew Protection
New project deployments can lead to version skew. This can happen when your users are using your app and a new version gets deployed. Their deployment version requests assets from an older version. And those assets from the previous version got replaced. This can cause errors when those active users navigate or interact with your project.
SvelteKit has a skew protection solution. When it detects version skew, it triggers a hard reload of a page to sync to the latest version. This does mean the client-side state gets lost. With Vercel skew protection, client requests get routed to their original deployment. No client-side state gets lost. To enable it, visit the Advanced section of your project settings on Vercel.
Learn more about skew protection with SvelteKit.
To summarize, the benefits of using ISR with SvelteKit on Vercel include:
- Mitigates the risk of your active users encountering version skew
- Avoids hard reloads for current active users on your project
Learn more about skew protection on Vercel.
Image Optimization
Image Optimization helps you achieve faster page loads by reducing the size of images and using modern image formats.
When deploying to Vercel, you can optimize your images on demand, keeping your build times fast while improving your page load performance and Core Web Vitals.
To use Image Optimization with SvelteKit on Vercel, use the @sveltejs/adapter-vercel within your svelte.config.ts file.
exportdefault {
kit: {
images: {
adapter({
sizes: [640,828,1200,1920,3840],
TypeScript
import adapter from'@sveltejs/adapter-vercel';
}
})
minimumCacheTTL: 300,
}
domains: ['example-app.vercel.app'],
formats: ['image/avif','image/webp'],
This allows you to specify configuration options for Vercel's native image optimization API.
To use image optimization with SvelteKit, you have to construct your own srcset URLs. You can create a library function that will optimize srcset URLs in production for you like this:
import { dev } from'$app/environment';
return widths
.slice()
if (dev) return src;
.sort((a, b) => a - b)
TypeScript
exportfunctionoptimize(src:string, widths = [640,960,1280], quality =90) {
})
.join(', ');
.map((width, i) => {
return url + descriptor;
}
constdescriptor= i
Use an img or any other image component with an optimized srcset generated by the optimize function:
import { optimize } from '$lib/image';
TypeScript
import type { Photo } from '$lib/types';
/>
/>
export let photo: Photo;
alt={photo.description}
class="absolute left-0 top-0 w-full h-full"
srcset={optimize(photo.url)}
- Configure image optimization with @sveltejs/adapter-vercel
- Optimize for production with a function that constructs optimized srcset for your images
- Helps your team ensure great performance by default
- Keeps your builds fast by optimizing images on-demand
You can reach our customer support team by emailing info@yourcompany.example.com, calling +1 555-555-5556, or using the live chat on our website. Our dedicated team is available 24/7 to assist with any inquiries or issues.
We’re committed to providing prompt and effective solutions to ensure your satisfaction.
We offer a 30-day return policy for all products. Items must be in their original condition, unused, and include the receipt or proof of purchase. Refunds are processed within 5-7 business days of receiving the returned item.