
Nuxt is an open-source framework that streamlines the process of creating modern Vue apps. It offers server-side rendering, SEO features, automatic code splitting, prerendering, and more out of the box. It also has an extensive catalog of community-built modules, which allow you to integrate popular tools with your projects.
You can deploy Nuxt static and server-side rendered sites on Vercel with no configuration required.
Getting started
To get started with Nuxt on Vercel:
- If you already have a project with Nuxt, install Vercel CLI and run the vercel command from your project's root directory
- Clone one of our Nuxt example repos to your favorite git provider and deploy it on Vercel with the button below:


" A trusted partner for growth.
Professional, efficient, and always ahead of the curve. "
" Outstanding service and results!
They exceeded our expectations in every project. "


Customizable Settings
User-Friendly Interface
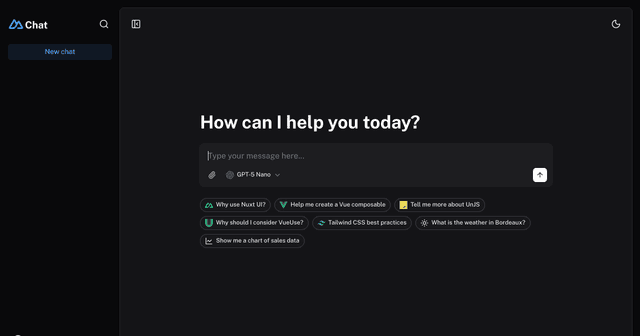
An AI chatbot template to build your own chatbot powered by Nuxt MDC and Vercel AI SDK.
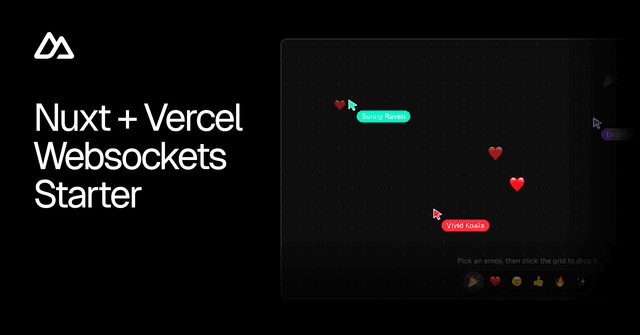
Realtime live cursors, presence, and emoji reactions over a WebSocket
Or, choose a template from Vercel's marketplace:
Choosing a build command
The following table outlines the differences between nuxt build and nuxt generate on Vercel:
Feature
Default build command
nuxt generate
nuxt build
Yes
No
Supports all Vercel features out of the box
Yes
Yes
Yes
No
In general, nuxt build is likely best for most use cases. Consider using nuxt generate to build fully static sites.
Editing your Nuxt config
You can configure your Nuxt deployment by creating a Nuxt config file in your project's root directory. It can be a TypeScript, JavaScript, or MJS file, but the Nuxt team recommends using TypeScript. Using TypeScript will allow your editor to suggest the correct names for configuration options, which can help mitigate typos.
Your Nuxt config file should default export defineNuxtConfig by default, which you can add an options object to.
The following is an example of a Nuxt config file with no options defined:

});
exportdefaultdefineNuxtConfig({
// Config options here
TypeScript

- Create redirects
- Modify a route's response headers
- Enable ISR
- Deploy specific routes statically
- Deploy specific routes with SSR
- and more
Using routeRules
The following is an example of a Nuxt config that:
With the routeRules config option, you can:
- Creates a redirect
- Modifies a route's response headers
- Opts a set of routes into client-side rendering

routeRules: {
exportdefaultdefineNuxtConfig({
// Enables client-side rendering
TypeScript
'/modify-headers-route': { headers: { 'x-magic-of':'nuxt and vercel' } },
},
});
'/spa': { ssr:false },
To learn more about routeRules:
'/examples/*': { redirect:'/redirect-route' },
Reading and writing files
Nuxt deploys routes defined in /server/api, /server/routes, and /server/middleware as one server-rendered Function by default. Nuxt Pages, APIs, and Middleware routes get bundled into a single Vercel Function.
You can test your API Routes with nuxt dev.
The following is an example of a basic API Route in Nuxt:
exportdefaultdefineEventHandler(() =>'Hello World!');
TypeScript
Vercel Functions enable developers to write functions that use resources that scale up and down based on traffic demands. This prevents them from failing during peak hours, but keeps them from running up high costs during periods of low activity.
};
To access server assets, you can use Nitro's storage API:
return {
// https://nitro.unjs.io/guide/assets#server-assets
constassets=useStorage('assets:server');
TypeScript
To write files, mount Redis storage with a Redis driver such as the Upstash Redis driver.
users,
});
constusers=awaitassets.getItem('users.json');
First, install Upstash Redis from the Vercel Marketplace to get your Redis credentials.
exportdefaultdefineEventHandler(async () => {
You can read and write server files with Nuxt on Vercel. One way to do this is by using Nitro with Vercel Functions and a Redis driver such as the Upstash Redis driver. Use Nitro's server assets to include files in your project deployment. Assets within server/assets get included by default.
});
nitro: {
storage: {
TypeScript
Then update your nuxt.config.ts file:
},
},
},
Use with the storage API.
exportdefaultdefineNuxtConfig({
data: { driver:'upstash' },
return {
constdataStorage=useStorage('data');
awaitdataStorage.setItem('hello','world');
TypeScript
exportdefaultdefineEventHandler(async (event) => {
};
});
See an example code repository.
Nuxt has two forms of Middleware:
hello:awaitdataStorage.getItem('hello'),
Middleware is code that executes before a request gets processed. Because Middleware runs before the cache, it's an effective way of providing personalization to statically generated content.
Nuxt server middleware on Vercel
In Nuxt, modules defined in /server/middleware will get deployed as server middleware. Server middleware should not have a return statement or send a response to the request.
Server middleware is best used to read data from or add data to a request's context. Doing so allows you to handle authentication or check a request's params, headers, url, and more.
You can reach our customer support team by emailing info@yourcompany.example.com, calling +1 555-555-5556, or using the live chat on our website. Our dedicated team is available 24/7 to assist with any inquiries or issues.
We’re committed to providing prompt and effective solutions to ensure your satisfaction.
We offer a 30-day return policy for all products. Items must be in their original condition, unused, and include the receipt or proof of purchase. Refunds are processed within 5-7 business days of receiving the returned item.
import { getUserFromDBbyCookie } from'some-orm-package';
event.context.user = user;
// The getCookie method is available to all
event.context.session_token = token;
exportdefaultdefineEventHandler(async (event) => {
TypeScript
consttoken=getCookie(event,'session_token');
if (user) {
// made up for this example. You can fetch
// data from wherever you want here
// Nuxt routes by default. No need to import.
// getUserFromDBbyCookie is a placeholder
const { user } =awaitgetUserFromDBbyCookie(event.request);
You could then access that data in a page on the frontend with the useRequestEvent hook. This hook is only available in routes deployed with SSR. If your page renders in the browser, useRequestEvent will return undefined.
The following example demonstrates a page fetching data with useRequestEvent:

const event = useRequestEvent();
TypeScript
const user = ref(event.context?.user);


